Veriscope Installation Guide
Veriscope Installation
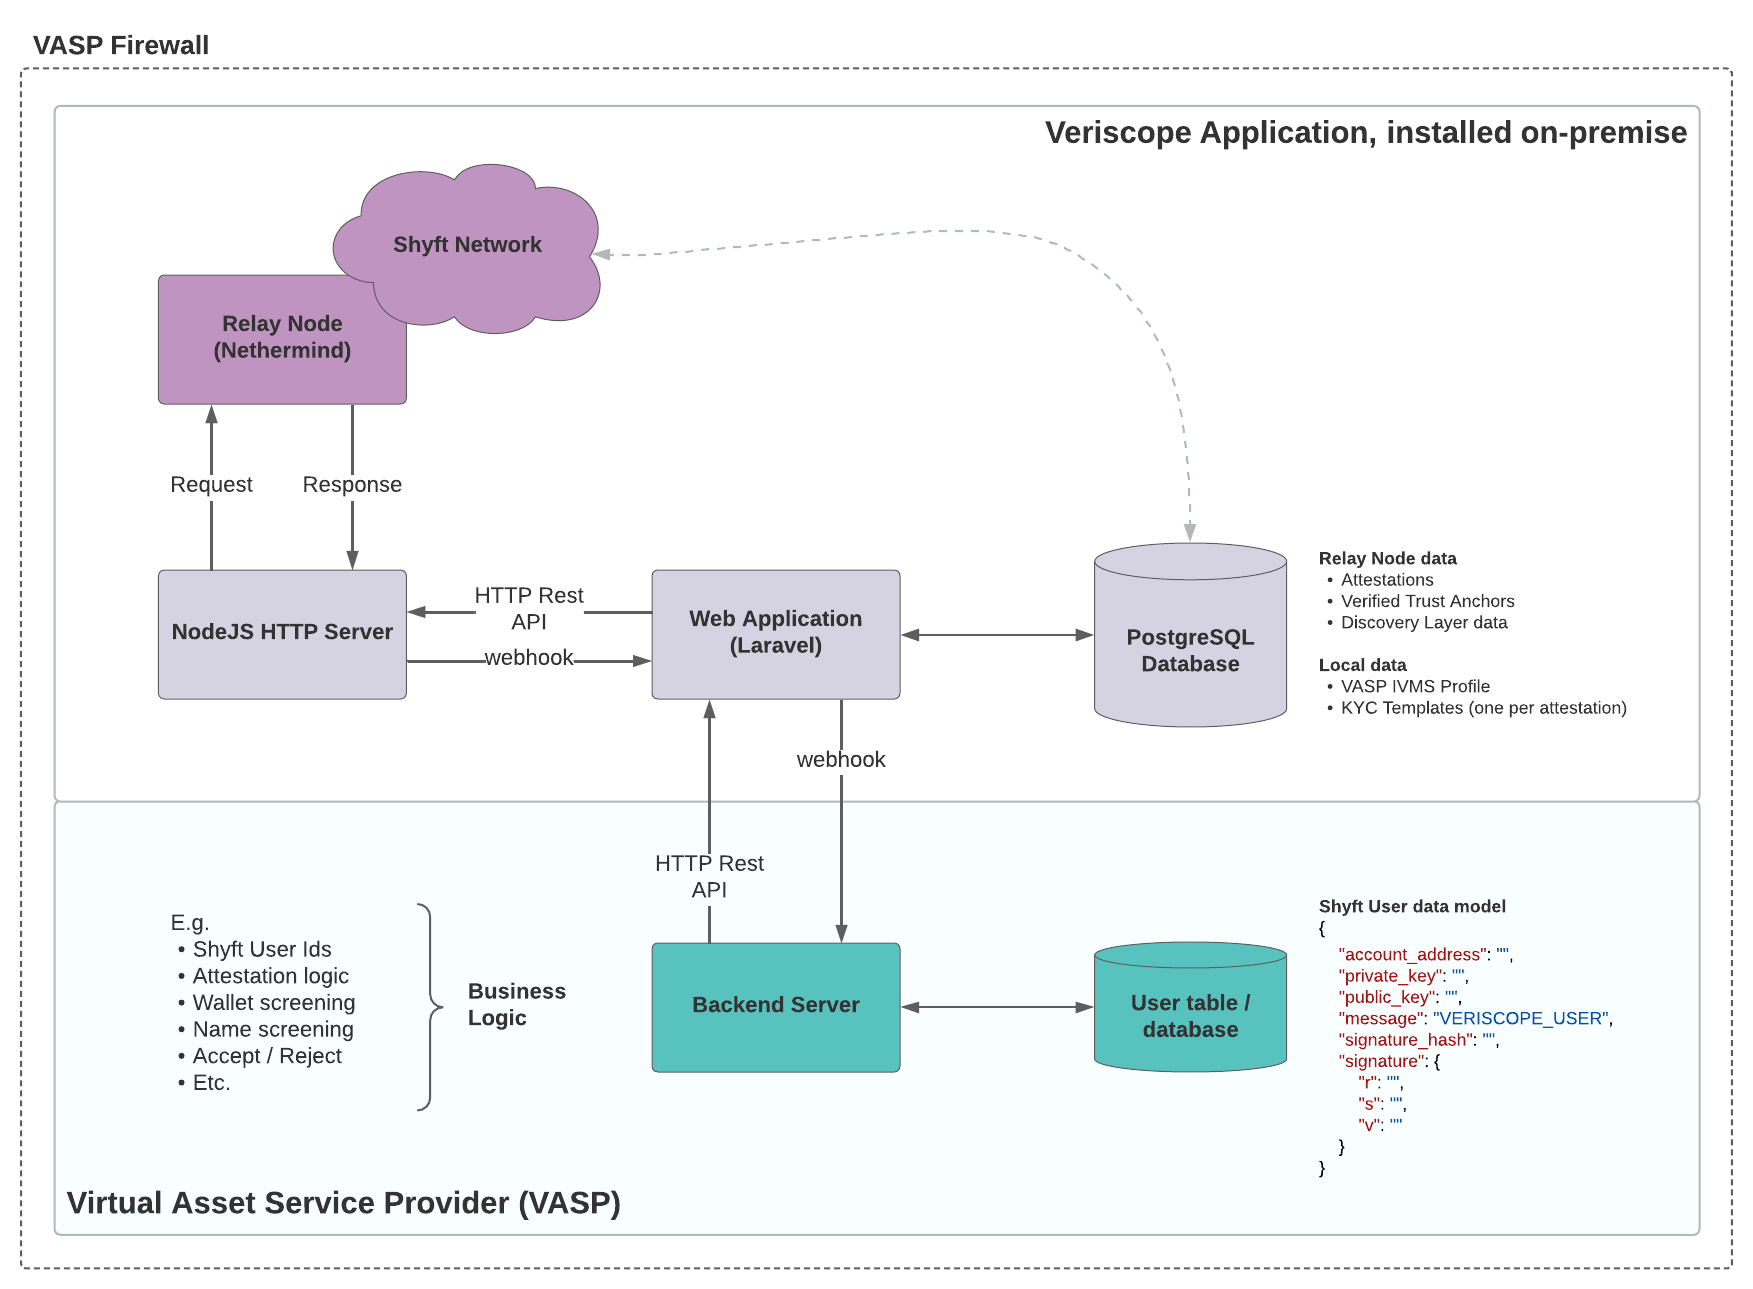
The Veriscope GitHub repo comes with a complete installer/set-up script which installs the following components and also sets-up an admin user for your Veriscope web application:
-
Dependencies & pre-requisites, e.g. npm and PostgreSQL
-
A Nethermind Node (client responsible for synchronizing the Shyft Network blockchain)
-
A Nginx web-server (serving SSL connections with a reverse-proxy to backend services running NodeJS and PHP Artisan)
-
A NodeJS web service
-
A Laravel/PHP Web Application
-
Redis to manage/post attestations
-
Horizon dashboard to monitor Redis queues (a view is included in the Veriscope web-app)
|
To install Veriscope using the set-up script, you first need to provision a machine/server that:
It is recommended to use Ubuntu 20.04 with the following hardware, at a minimum:
Once Veriscope is installed, run the following to check that ports are as expected: |
|
The following information will be generated during the installation process and will be required in subsequent steps. It is important this information is stored & shared securely.
|
Active testnet nodes can be viewed at fedstats.veriscope.network