Setup Script
Option 1: Setup Script
sudo scripts/setup-vasp.sh+ Located in /opt/veriscope/
+ Service user will be forge
1) Refresh dependencies
2) Install/update nethermind
3) Set up new postgres user
4) Obtain/renew SSL certificate
5) Install/update NGINX
6) Install/update node.js web service
7) Install/update PHP web service
8) Update static node list for nethermind
9) Create admin user
10) Regenerate webhook secret
11) Regenerate oauth secret (passport)
12) Regenerate encrypt secret (EloquentEncryption)
13) Install Redis server
14) Install Passport Client Environment Variables
15) Install Horizon
16) Install Address Proofs
i) Install Everything
p) show daemon status
w) restart all services
r) reboot
q) quit
Choose what to do:
|
Stop ta-node-1 service
sudo systemctl stop ta-node-1Restart ta-node-1 service
sudo systemctl restart ta-node-1You can either step through each step — see note below — or choose i (Install Everything) and run steps 9 & 16 once that has completed.
|
For step 16 (
|
Each step explained
1) Refresh dependencies
Updates all packages on the operating system, and installs software dependencies for all subsequent components - examples include libsnappy for Nethermind, PHP and node.js for web services, and npm and composer for managing web service dependencies.
This step also installs unconfigured PostgreSQL and Nginx servers and two cron jobs for housekeeping: automatic clock synchronication with internet time servers, and purging old logs.
2) Install/update nethermind
Nethermind is the Etherum implementation used on Shyft. This is installed to /opt/nm/ with its config file in /opt/nm/config.cfg, and the chain state in /opt/nm/nethermind_db.
├── Data
├── NLog.config
├── Nethermind.Cli
├── Nethermind.Launcher
├── Nethermind.Runner
├── config.cfg
├── git-hash
├── keystore
├── logs
├── nethermind_db
├── plugins
├── shyftchainspec.json
└── static-nodes.json
This step will create a random account — i.e. your trust anchor account — and provide its public/private key pair. These must be kept someplace safe for permanent systems.
If you intend to use an RPC connection instead of synchronizing the blockchain locally, terminate Nethermind and change the HTTP and WS params in the .env of veriscope_ta_node/.env to the provided rpc domain.
|
pwd
/opt/veriscope/veriscope_ta_node
cat .env
#RPC Replace HTTP and WS below with the following
#HTTP="https://rpc.shyft.network/"
#WS="wss://rpc.shyft.network/"
Terminate nethermind and restart the ta-node-1 service as follows:
sudo systemctl stop nethermind
sudo systemctl restart ta-node-1
3. Set-up new PostgreSQL user
The trust anchor web service relies on PostgreSQL to store attestations. This will create a new Postgres user, displaying its password and storing it where the web services can find it. It will also create a database called trustanchor. The database schema will be created when the PHP webservice is installed.
4. Obtain/renew SSL certificate
This obtains a SSL certificate from Let’s Encrypt for the domain name that you configured in /opt/veriscope/.env, and deploys it in a place where nginx can find it.
5. Install/update nginx
This creates a config file for the web services in /etc/nginx/sites-enabled/ta-dashboard.conf, enables nginx to start
on boot, and starts nginx.
The deployed configuration is set to serve the web services over port 443, by reverse-proxying connections to backend node.js and PHP servers.
6. Install/update node.js web service
The node webservice is several components - operating in systemd units called ta-node-1 and ta-node-2. This step installed
node.js dependencies into /opt/veriscope/node_modules, then installs activates and starts the systemd units.
| This step copies over the correct ABIs depending on the chain target and places them here: |
$ pwd
/opt/veriscope/veriscope_ta_node/artifacts
7. Install/update PHP web service
The PHP webservice is several components - operating in systemd units called ta-schedule, ta-wss and ta. These carry out respectively, scheduled cron-type jobs, a websocket server, and web server. This step installs installs some PHP dependencies via composer, builds the schema and seed data in the Postgres Database, then installs, enables and starts those systemd units.
8. Update static node list for Nethermind
Nethermind relies upon a list of static nodes to find servers to exchange blockchain information with. The nethermind config sets this to be in /opt/nm/static-nodes.json. Each machine is identified by an enode url, formatted like enode://{key}@{ip_address}:{port}.
The Nethermind setup step obtains your server’s enode, and adds it to the 'contact' field used in the ethstats service at fedstats.veriscope.network. This command replaces your enode list with one obtained from the ethstats server, then restarts Nethermind to use it.
| This is optional and only recommended when synchronizing the blockchain with your nethermind relay node. |
9. Create admin user
The Web Application requires an admin user to manage the Trust Anchor account. Use this option to create an account so you can sign into the application.
10. Regenerate webhook secret
The Web Application receives data from the node scripts over a webhook url. This url is secured using a shared key. This step creates or refreshes the share key in each .env file.
11. Regenerate oauth secret (passport)
The Web API is authenticated using Laravel Password (OAuth2). This step generates or regenerates the oauth public/private keys stored in veriscope_ta_dashboard/storage/. Further reading can be found on the Laravel website laravel.com/docs/8.x/passport/[here.
12. Regenerate encrypt secret (EloquentEncryption)
The Web Application generates a number of Crypto Wallet Accounts as well as TrustAnchor Users. Private keys are stored in the DB encrypted. This step generates or regenerates the encryption keys stored in veriscope_ta_dashboard/storage/app/. Futher reading can be found here: github.com/RichardStyles/EloquentEncryption[github.com/RichardStyles/EloquentEncryption.
13. Install Redis server
The NodeJs Application manages posting of Attestations and Pending Transactions via a queuing framework. Information on the framework can be found here: The fastest, most reliable, Redis-based queue for Node[The fastest, most reliable, Redis-based queue for Node..
Redis is an open source (BSD licensed), in-memory data structure store, used as a database, cache, and message.
To read more on the motivation for queuing attestations, see Veriscope Queuing System.
14. Install Passport Client Environment Variables
Passport OAuth Client variables are required set in the environment file in order to generate API token in the backoffice. Using this command you can set the variables in the environment file automatically, i.e. "php artisan passportenv:link".
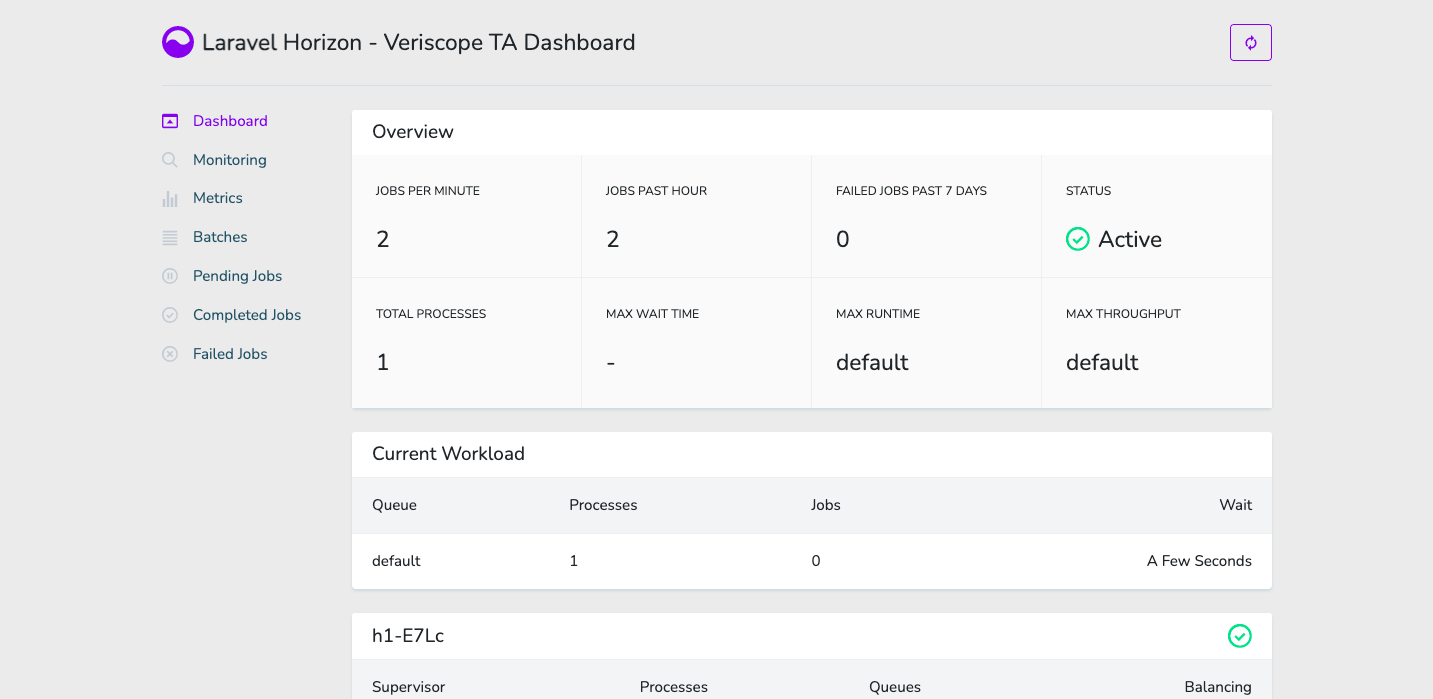
15. Install Horizon
Install Laravel Horizon which provides a beautiful dashboard and code-driven configuration for your Laravel powered Redis queues. Horizon allows you to easily monitor key metrics of your queue system such as job throughput, runtime, and job failures.